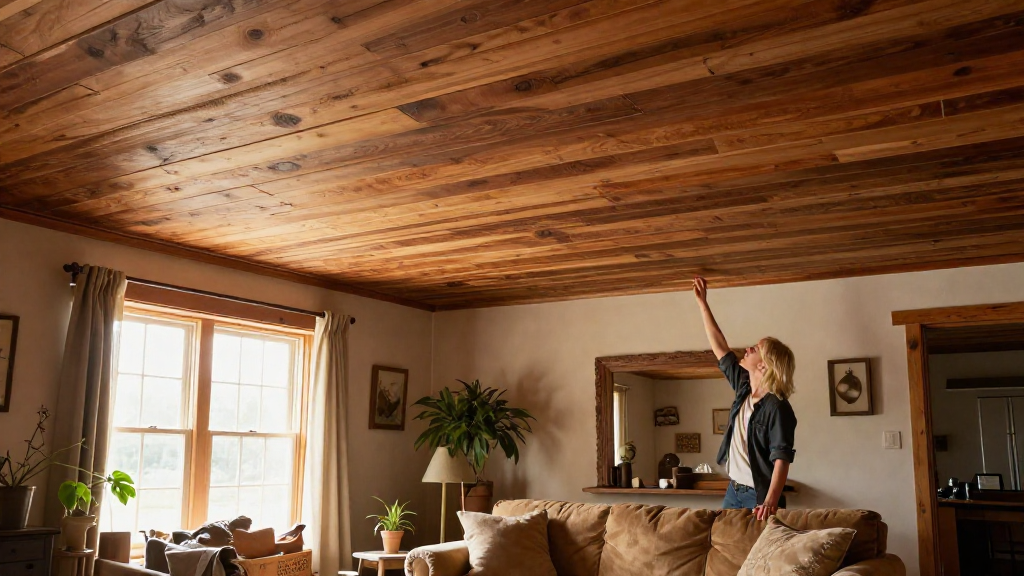
Adding a rustic wood panel ceiling can transform your living space, giving it warmth and character.
In this article, we will discuss the steps, materials, and techniques involved in creating a stunning rustic wood panel ceiling.
Why Choose a Rustic Wood Panel Ceiling?
A rustic wood panel ceiling is an excellent choice for those looking to enhance the aesthetic of their home.
Here are a few reasons why you should consider this design:
- Natural Beauty: Wood panels bring in the warmth of nature.
- Versatile Design: They can complement various interior styles, from farmhouse to contemporary.
- Increased Home Value: Adding wood accents can elevate your property’s appeal.
- Durability: Quality wood, when treated properly, can last for decades.
What Materials Do You Need For a Rustic Wood Panel Ceiling?
To achieve a stunning rustic wood panel ceiling, it’s essential to use the right materials.
Here’s a list of what you will need:
- Wood Panels: Select high-quality wood, such as pine, cedar, or reclaimed barn wood, for an authentic look.
- Underlayment: This helps with insulation and prevents moisture damage.
- Adhesive: A strong adhesive will bond the panels to the ceiling securely.
- Nails or Screws: For additional support, use finish nails or screws when installing the panels.
- Stain or Paint: Depending on your style preference, select a stain or paint to finish the wood.
- Tools: You will need a saw, level, drill, measuring tape, and safety equipment like goggles and gloves.
How Do You Prepare Your Ceiling for Installation?
Before adding the wood panels, it’s crucial to prepare your ceiling properly.
Here’s how to do it:
- Clean the Ceiling: Remove any dirt, dust, or existing fixtures from the ceiling surface.
- Inspect for Damage: Check for water damage or holes that may need repair.
- Decide on Panel Layout: Figure out the direction in which you want to install the panels, aligning them to fit the room’s layout.
- Measure and Mark: Use a measuring tape to mark the area where the panels will go. A chalk line can help you draw straight lines across the ceiling.
- Install Underlayment (if needed): If you are using an underlayment, now is the time to install it. This will not only protect your ceiling but also provide soundproofing and insulation.
How Do You Install Wood Panels on Your Ceiling?
Installing wood panels may seem daunting, but following these steps can make the process smooth and rewarding.
Step 1: Start with Your First Panel
- Align your first panel with your chalk line, ensuring it is straight.
- Apply adhesive to the back of the panel and press it firmly against the ceiling.
- Secure it with finish nails or screws for extra stability.
Step 2: Continue Installing Panels
- Take your next panel and repeat the process, ensuring each piece fits snugly against the last.
- Use spacers (if desired) to maintain even gaps, allowing for expansion and contraction of the wood.
Step 3: Cut Panels as Necessary
- When you reach corners or edges, you may need to cut panels to fit.
- Use a saw to make straight cuts and ensure safety with goggles.
Step 4: Finish the Ceiling
- Once all panels are installed, you can add a coat of stain or paint.
- This step can bring out the natural grain of the wood and enhance the rustic look.
Step 5: Add Trim for a Polished Look
- Consider adding crown molding or wood trim around the edges to give your rustic wood panel ceiling a finished appearance.
- Select a color or stain that complements the wood panels.
What Maintenance Does a Rustic Wood Panel Ceiling Require?
After installing your rustic wood panel ceiling, it’s important to maintain its beauty over time.
Here are some simple maintenance tips:
- Regular Cleaning: Dust your ceiling regularly to keep it looking fresh.
- Check for Damage: Periodically inspect panels for signs of water damage or pest infestations.
- Refinish as Needed: Depending on exposure to sunlight or moisture, you may need to reapply stain or sealant every few years.
- Ventilation: Ensure your attic or ceiling space has proper ventilation to prevent moisture build-up.
How Does a Rustic Wood Panel Ceiling Affect Room Atmosphere?
A rustic wood panel ceiling can significantly change the ambiance of a room.
Here are some effects you might notice:
- Warmth and Coziness: Wood inherently brings a sense of warmth, making spaces feel more inviting.
- Acoustic Benefits: The sound absorption characteristics of wood can improve the acoustic quality of a room, reducing echoes.
- Focal Point: A beautifully crafted ceiling can serve as a stunning focal point in the room, drawing attention and inspiring conversations.
Conclusion: Is a Rustic Wood Panel Ceiling Right for You?
A rustic wood panel ceiling is an excellent way to enhance any room.
With the right materials and techniques, you can create a stunning ceiling that adds both beauty and value to your home.
Consider your existing decor, the atmosphere you aspire to create, and your comfort level with DIY projects.
Once you’ve decided, gather your materials, follow the above steps, and enjoy the transformation of your space.
Whether you opt for a full rustic wood panel ceiling in your living room or a smaller accent in a bedroom, the result will be a charming and inviting environment that you and your guests will love.